

ryobi string trimmer owners manual
Lost your Ryobi string trimmer manual? Don't sweat it! We've got a huge collection of free, downloadable manuals to get your yard work back on track. Find your **Ryobi string trimmer** info here!
Ryobi String Trimmer Owners Manual: A Comprehensive Guide
Ryobi owners frequently discuss battery compatibility, replacement options, and performance across various tools, including mowers and trimmers, seeking cost-effective solutions and reliable power.
Ryobi string trimmers represent a popular choice for homeowners tackling yard maintenance, offering a blend of affordability and functionality within their One+ system. Discussions reveal a strong user base actively seeking information regarding battery life, compatibility between different Ryobi tools, and the performance of aftermarket batteries versus official Ryobi products.
Many users appreciate the versatility of split-shaft trimmers, allowing for attachment conversions to edgers. Concerns often center around battery longevity, with some owners reporting issues after several years of use, prompting searches for suitable replacements. The availability of generic battery options, alongside Ryobi’s own offerings, is a frequent topic of debate, weighing cost against perceived quality and performance.
Understanding Your Ryobi Model
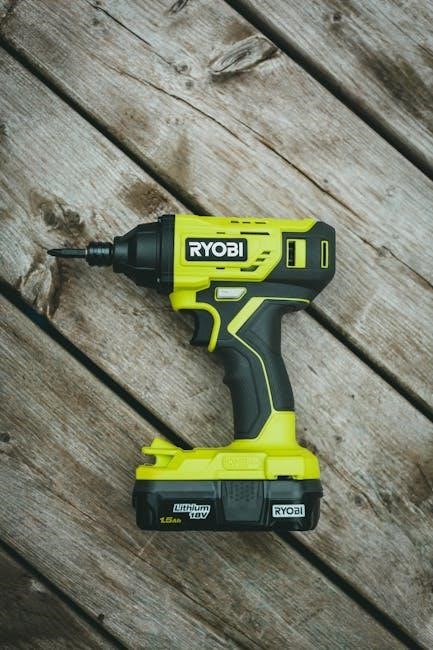
Ryobi offers a diverse range of string trimmer models, encompassing both corded and cordless (battery-powered) options, often utilizing their One+ 18V or 36V battery platforms. Identifying your specific model number – like RLM36B46L – is crucial for sourcing compatible parts and accessing accurate documentation. The split-shaft design is a common feature, enabling attachment versatility, including edgers.

Battery voltage and amp-hour (Ah) ratings significantly impact runtime and power. Users discuss the benefits of 5.0Ah batteries for extended use, while acknowledging the availability of aftermarket alternatives; Understanding whether your trimmer utilizes a single or dual battery setup is also key. Familiarize yourself with the specific features of your model to maximize its performance and lifespan.
Safety Precautions
Prioritize safety when operating your Ryobi string trimmer. Always wear appropriate personal protective equipment (PPE), including eye protection, hearing protection, and sturdy footwear. Be mindful of bystanders and pets, maintaining a safe operating distance. Inspect the trimmer head and cutting string for damage before each use.
Never operate a corded trimmer in wet conditions to avoid electric shock. For battery models, ensure batteries are securely installed. Avoid trimming near electrical wires or underground utilities. Disconnect the battery or unplug the cord before making any adjustments or repairs. Regularly check for loose fasteners and damaged components. Safe operation prevents injuries and extends the life of your tool.
General Safety Rules
Read the entire owner’s manual before operating your Ryobi string trimmer to understand all safety warnings and instructions. Keep children, bystanders, and pets away from the work area. Never operate the trimmer while fatigued or under the influence of drugs or alcohol. Maintain a firm grip on the handles at all times during operation.
Be aware of your surroundings and potential hazards, such as uneven terrain or hidden objects. Avoid using the trimmer in poor lighting conditions. Always disconnect the power source before changing accessories or performing maintenance. Store the trimmer in a secure, dry location out of reach of children. Following these rules ensures a safer trimming experience.
Specific String Trimmer Safety
Always wear appropriate personal protective equipment (PPE), including eye protection, hearing protection, and sturdy footwear, when operating the Ryobi string trimmer. Avoid trimming near electrical wires or underground utilities. Inspect the trimmer head and string for damage before each use. Never use a damaged trimmer.
Be mindful of flying debris and keep your body to the side of the trimming path. Do not force the trimmer; let the cutting string do the work. Avoid trimming in wet or slippery conditions. Regularly check the string length and replace it as needed to maintain optimal performance and safety. Proper technique minimizes risks.
Parts Identification
Ryobi string trimmers consist of several key components. The trimmer head houses the cutting string and facilitates its feed during operation. The shaft connects the head to the power source and handle, often split for easier storage. The handle provides control and incorporates the trigger and safety lock.
The power source varies – either a battery pack (typically 18V or 36V One+ models) or a corded electric motor. Understanding these parts is crucial for assembly, maintenance, and troubleshooting. Familiarize yourself with the location of each component before beginning any work on your Ryobi trimmer.
Trimmer Head Components
Ryobi trimmer heads feature a spool that holds the cutting string, typically 1.6mm or similar. A spring-loaded feed mechanism advances the string as it wears down during trimming. The eyelets guide the string as it extends for cutting. A bump feed knob, present on many models, manually releases more string by tapping the head on the ground.

The head also includes a guard to protect the user from flying debris. Inspect these components regularly for wear and damage. Proper function of the spool, feed mechanism, and eyelets is essential for efficient trimming and preventing string breakage. Replacing worn parts ensures optimal performance.
Shaft and Handle Assembly
Ryobi string trimmers often utilize a split-shaft design, allowing for easy attachment of various accessories like edgers. The shaft sections connect securely, typically with a locking mechanism. The handle assembly provides comfortable grip and control during operation, often featuring adjustable height and ergonomic designs.
Controls for power, speed, and string feed are integrated into the handle. Ensure all connections are tight before use to prevent wobble or instability. Regularly inspect the shaft for cracks or damage. A properly assembled shaft and handle contribute significantly to user comfort and safe operation of the trimmer.
Power Source (Battery/Corded)
Ryobi string trimmers are available in both battery-powered and corded electric models. Battery models utilize Ryobi’s One+ 18V or 36V systems, offering cordless convenience and compatibility with a wide range of tools. Users discuss battery life and replacement costs, often exploring generic options to save money.
Corded models provide consistent power but require an extension cord. Regardless of the power source, always ensure proper voltage and amperage. Battery care is crucial for longevity; follow charging and storage guidelines. Understanding your trimmer’s power source is fundamental for optimal performance and safety.
Assembly Instructions
Ryobi string trimmer assembly typically involves attaching the trimmer head to the shaft, connecting shaft sections (for split-shaft models), and installing the handle and controls. Ensure all components click securely into place. Carefully align the trimmer head, verifying proper rotation before tightening.
For split-shaft trimmers, connect sections firmly, ensuring the locking mechanisms engage. Attach the handle, adjusting for comfortable grip and control access. Double-check all connections before operation. Refer to your specific model’s diagram for detailed guidance. Proper assembly is vital for safe and efficient trimming.
Attaching the String Trimmer Head
To attach the Ryobi string trimmer head, align it with the shaft receiver. Push the head firmly onto the shaft until it clicks securely into place – a positive lock is crucial. Verify free rotation of the head before fully tightening any locking knobs or collars.
Incorrect attachment can lead to string feed issues or unsafe operation. Ensure the head is properly seated to prevent detachment during use. Some models may require aligning specific tabs or slots. Consult your model’s diagram for precise instructions. A secure connection guarantees optimal trimming performance and user safety.
Connecting the Shaft Sections
Ryobi split-shaft trimmers require connecting sections for full assembly. Align the male and female ends of each shaft segment, ensuring no debris obstructs the connection. Insert the sections and rotate until the locking buttons or collars engage with a distinct click.
Verify a secure fit by attempting to twist the sections apart – they should remain firmly joined. Proper alignment prevents wobble during operation and ensures efficient power transfer. Some models feature quick-release mechanisms for easy disassembly. Always double-check the connection before starting the trimmer to avoid unexpected separation during use, potentially causing injury.
Installing the Handle and Controls
Ryobi string trimmer handles typically attach to the shaft with bolts or quick-release levers. Align the handle assembly with the designated mounting points on the trimmer shaft. Securely fasten the handle using the provided hardware, ensuring it’s tightened adequately but not over-torqued.
Connect the control wires or cables, if applicable, following the diagram in your model’s specific manual. Verify that the throttle trigger and other controls operate smoothly and respond correctly. Proper handle installation provides comfortable control and safe operation. Double-check all connections before use to prevent malfunctions during trimming.
Operating Instructions
Ryobi string trimmers start with a battery insertion or cord connection, followed by a safety lock-off button press. For battery models, ensure a fully charged battery is installed. Depress the trigger to initiate operation, maintaining a firm grip on the handle.
Trim in a sweeping motion, keeping the trimmer head slightly angled towards the vegetation. Avoid forcing the trimmer; let the string do the work. Adjust cutting height by tilting the trimmer head or extending the shaft. Regularly inspect the string for wear and replace as needed for optimal performance and safety.
Starting the Trimmer (Battery/Corded)
For battery-powered Ryobi trimmers, first, verify the battery is fully charged and securely inserted into the tool. Then, depress and hold the safety lock-off button. Simultaneously, squeeze the trigger to initiate the motor. Release the trigger to stop. For corded models, ensure the extension cord is properly grounded and connected to a suitable power outlet.
Confirm the power switch is in the “off” position before plugging in. Once connected, switch the trimmer to “on” and proceed with operation. Always disconnect the power cord when not in use or during maintenance.
Proper Trimming Techniques
Employ a sweeping motion, moving the Ryobi trimmer side to side, rather than forcing it directly into the grass. Maintain a consistent speed for an even cut. Avoid scalping the lawn by keeping the trimmer head at a slight angle; When trimming around obstacles like trees or fences, reduce speed and exercise caution.

For edging, tilt the trimmer head and use the string to define clean lines along driveways and sidewalks. Regularly clear cut grass and debris from the trimmer head to prevent clogging and ensure optimal performance. Remember safety glasses are crucial during operation.

Adjusting Cutting Height
Ryobi string trimmers often feature adjustable cutting heights, typically controlled via the trimmer head or shaft length. Some models utilize a fixed-height head, while others offer telescoping shafts for customized adjustments. To raise the cutting height, extend the shaft or adjust the head accordingly. Lowering the height involves retracting the shaft or adjusting the head downwards.
Always ensure the trimmer is switched off before making any adjustments. Start with a higher setting to avoid scalping, then gradually lower it to achieve the desired cut. Regularly check and readjust as needed based on terrain and grass conditions.
String Replacement
Maintaining optimal cutting performance with your Ryobi string trimmer requires regular string replacement. Users discuss various string types, including 1.6mm PowerFit line, noting its satisfactory performance. Compatibility is key; ensure the chosen string suits your specific Ryobi model. Replacing the string involves accessing the spool within the trimmer head, removing the old string, and winding the new line onto the spool in the direction indicated by the trimmer’s markings.
Proper winding prevents tangling and ensures smooth feeding. Troubleshooting feed issues is common, often resolved by correctly seating the spool and ensuring the line isn’t jammed.
Types of String Compatible with Ryobi Trimmers
Ryobi string trimmers accommodate a range of string types, impacting cutting efficiency and durability. Many users report positive experiences with PowerFit 1.6mm line, praising its performance for general trimming tasks. However, Ryobi models can also utilize different diameters and shapes, including round, square, or multi-sided string, depending on the trimmer head design and intended use.
Consider the terrain; heavier-duty string is beneficial for thicker weeds and brush. Always consult your owner’s manual for the recommended string size and type for your specific Ryobi trimmer model to avoid damage and ensure optimal cutting performance.
Loading String into the Spool
Ryobi trimmer spool loading varies slightly by model, but generally involves separating the trimmer head halves and inserting the new string. Ensure the correct string type and length, as specified in your owner’s manual, are used. Feed one end of the string into the spool’s eyelet, then wind the string evenly around the spool in the direction indicated by the arrows on the spool itself.
Leave sufficient string extending from both ends of the spool for easy feeding into the trimmer head. Reassemble the head halves securely, ensuring the string is properly seated in the line guides. A properly loaded spool prevents frustrating feed issues during operation.
Troubleshooting String Feed Issues
Ryobi string trimmer feed problems are common, often stemming from incorrect string loading or a dirty trimmer head. First, verify the string is wound tightly and evenly on the spool, with enough length extending from the head. Check for tangled or broken string within the spool or line guides. Disassemble the head and clean any debris obstructing the feed mechanism.
Ensure the spool is properly seated and locked into place. If issues persist, try a different string type – PowerFit line is often recommended by users. Finally, confirm the auto-feed mechanism isn’t damaged and functions smoothly during operation.
Battery Care and Maintenance (For Battery Models)
Ryobi battery longevity depends on proper care. Always use the Ryobi-supplied charger to avoid damage. Charge batteries fully before initial use and after prolonged storage. Avoid completely discharging batteries, as this can reduce their lifespan. Store batteries in a cool, dry place, away from direct sunlight and extreme temperatures.
Users often seek aftermarket battery options to reduce costs, but quality can vary. Regularly inspect batteries for physical damage. If a battery fails to charge or exhibits reduced runtime, consider replacement. Remember, Ryobi’s 36V tools can utilize two 18V batteries for increased power.
Charging the Battery
Ryobi batteries charge most efficiently when slightly warm, but avoid charging in direct sunlight or extremely hot environments. Ensure the charger’s air vents are unobstructed for proper cooling during the charging process. A full charge cycle typically takes several hours, depending on the battery’s capacity (Ah) and charger amperage.
The charger’s indicator light will signal when charging is complete. Do not leave the battery on the charger indefinitely after it’s fully charged, as this can reduce its lifespan. Using the correct Ryobi charger is crucial; incompatible chargers may damage the battery or pose a safety risk.
Battery Storage Guidelines
Ryobi lithium-ion batteries benefit from proper storage to maximize their lifespan. Ideally, store batteries in a cool, dry place, away from direct sunlight and extreme temperatures. A partially charged state (around 40-60%) is recommended for long-term storage, as fully charged or completely discharged batteries degrade faster.
Avoid storing batteries with metal objects, which can cause short circuits. Regularly check stored batteries to ensure they haven’t self-discharged to a critically low level. If a battery is stored for an extended period, it’s advisable to periodically check and recharge it to maintain optimal health and performance when needed.

Recognizing Battery Issues
Ryobi battery problems often manifest as reduced runtimes or failure to charge. A battery that won’t hold a charge, even after a full cycle, may be nearing the end of its life. Physical signs like swelling or damage to the battery casing indicate a serious issue and require immediate attention – do not use a damaged battery.
If a battery consistently fails to power the trimmer, or displays an error message on the charger, it could indicate a faulty battery or charger. Users have reported issues with older Ryobi batteries, prompting exploration of aftermarket alternatives. Always prioritize safety and discontinue use if any abnormalities are observed.
Maintenance and Troubleshooting

Ryobi string trimmer maintenance involves regular cleaning to remove grass and debris, preventing motor overheating and ensuring optimal performance. Inspect the trimmer head for damage and ensure proper string feed. Lubricate moving parts as needed to maintain smooth operation.
Common issues include string feed problems, often resolved by checking the spool and line for tangles. If the trimmer won’t start, verify the battery charge or power connection. Users discuss generic battery options, but compatibility should be confirmed. Addressing these issues promptly extends the trimmer’s lifespan and ensures efficient yard work.
Cleaning Your Ryobi String Trimmer
Regular cleaning is crucial for maintaining your Ryobi string trimmer’s performance and longevity. After each use, disconnect the power source – battery or cord. Remove any accumulated grass, dirt, and debris from the trimmer head, shaft, and handle using a brush or cloth. Pay close attention to the string trimmer head, ensuring the line outlet isn’t clogged.
Avoid using water directly on the motor or electrical components. A damp cloth is sufficient for wiping down the exterior. Inspect for any damage during cleaning. Consistent cleaning prevents overheating and ensures smooth operation, contributing to a longer lifespan for your Ryobi tool.

Lubrication Points
Proper lubrication extends the life of your Ryobi string trimmer. Focus on the trimmer head’s rotating components; a light application of lithium grease can ensure smooth operation. Check the shaft connections – if applicable – and apply a small amount of lubricant to prevent seizing. Avoid over-lubrication, as excess grease attracts dirt and debris.
For split-shaft models, the connection points between shaft sections benefit from occasional lubrication. Regularly inspect and lubricate any moving parts. Use a lubricant specifically designed for outdoor power equipment. Consistent lubrication reduces friction, minimizes wear and tear, and maintains optimal performance of your Ryobi trimmer.
Common Problems and Solutions
If your Ryobi trimmer won’t start, check the battery charge (for battery models) or the power cord connection (for corded models). String feed issues are frequent; ensure the spool is loaded correctly and the trimmer head is clean. A jammed trimmer head can often be resolved by removing the spool and clearing any debris.
Overheating can occur during extended use; allow the trimmer to cool down. If the motor stops unexpectedly, inspect for tangled vegetation. Battery problems, as discussed by users, may require replacement or using an adapter for alternative brands. Regular cleaning and maintenance prevent many issues, ensuring reliable operation.
Warranty Information
Ryobi tools, including string trimmers, are generally covered by a manufacturer’s warranty against defects in materials and workmanship. The standard warranty period typically ranges from three to five years, depending on the specific model and region. This warranty doesn’t cover items damaged through misuse, abuse, or normal wear and tear, such as trimmer line.
To make a warranty claim, retain your proof of purchase and contact Ryobi customer support. Registration of your tool may expedite the process. Extended warranties are often available for purchase, providing additional coverage beyond the standard term. Always review the complete warranty documentation for specific terms and conditions.
Ryobi Customer Support Contact Details
Ryobi provides multiple avenues for customer support regarding their string trimmers and other power tools. For assistance, you can visit the official Ryobi website, which features a comprehensive FAQ section, downloadable manuals, and troubleshooting guides. A live chat function is often available for immediate support during business hours.
Alternatively, you can contact Ryobi customer service via phone. The specific number varies by region, so consult the Ryobi website for your local contact details. Email support is also offered, allowing you to submit inquiries and receive responses within a specified timeframe. Online forums and communities dedicated to Ryobi tools can also provide peer-to-peer assistance.